

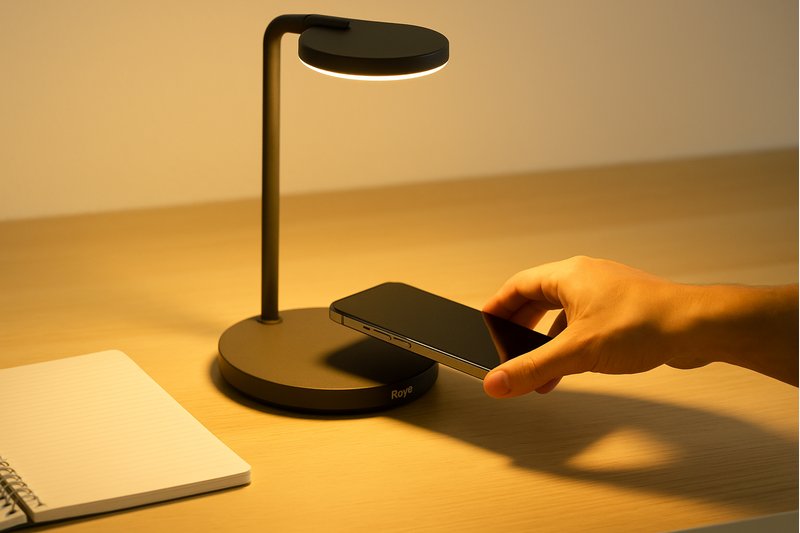
You place your new lamp on the corner of your desk, but you still end the day with tired, aching eyes. This lingering fatigue leads to headaches and forces you to re-read sentences, destroying your focus and productivity.
Correctly positioning your desk lamp—placing it on the opposite side of your writing hand and aiming the light source away from your eyes and screens—is the most critical factor in eliminating shadows and glare.
Let’s walk through the simple rules of placement that make a world of difference for your visual comfort.
How Do You Stop Your Hand from Casting Annoying Shadows?
You sit down to write in a notebook, and a perfect shadow of your writing hand appears, obscuring the very words you are trying to write. You have to constantly shift your angle or move the paper to see clearly, breaking your concentration.
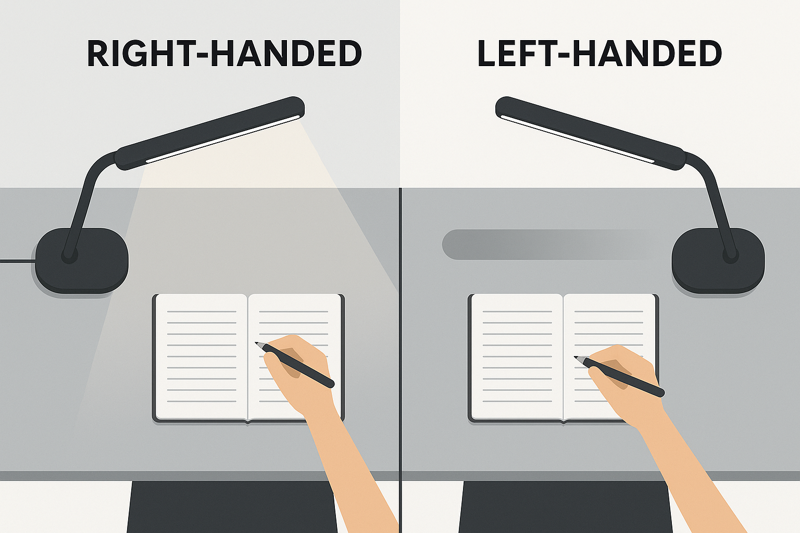
The solution is simple and absolute: always place your desk lamp on the opposite side of your dominant hand. This ensures light comes from the side and a bit from the front, completely preventing your hand and pen from creating shadows on your work.
I see this one mistake more than any other. I once visited a client's large architecture firm to see our lamps in action. The office manager had done a beautiful job setting up the desks, but he had placed every single lamp on the right side for a uniform, clean look. But about 90% of the architects were right-handed. They were all complaining about shadows getting in the way as they were sketching their detailed blueprints. We spent an hour moving every lamp to the left side of the desk. When we finished, it was like a wave of relief went through the office. They could finally see what they were doing without fighting their own shadow. This small, logical change made a massive improvement in their workflow. The physics behind it are straightforward. Your task is to get light onto the paper. Your hand, holding the pen, is an object that will block that light. If the light source is on the same side as your writing hand, your hand is always positioned between the light and the paper, creating a perfect shadow.
The Golden Rule of Handedness
This is the most important rule of task lighting1. It is non-negotiable for comfort and clarity. For right-handed people, the lamp must go on the left. For left-handed people, the lamp must go on the right. This allows the light to flow across your desk and onto your work from an angle your hand will never block. It doesn't matter if you are writing, drawing, painting miniatures, or doing electronic repairs. The principle is exactly the same. Your hand is the tool, and the light must be able to see the work that your tool is doing.
Beyond Just Writing
This rule is critical for any detailed task that you perform with your hands. Having a clear, shadow-free view reduces the small, constant adjustments your eyes and brain have to make, which directly reduces mental fatigue and allows you to stay focused for much longer periods. It's a fundamental principle of ergonomics2 that is too often overlooked.
| Task Being Performed | Your Dominant Hand | The Correct Side for Your Lamp | Why It Works |
|---|---|---|---|
| Writing in a Notebook | Right-Handed | Left Side | Light illuminates the page from the front-left, avoiding the hand's shadow. |
| Sketching or Drawing | Left-Handed | Right Side | Light comes in from the front-right, so the pencil's tip is always clearly lit. |
| Typing on Keyboard | N/A (Both Hands) | Left Side (Usually) | Most people use the mouse with their right hand, so placing it left keeps the lamp away from the mousepad. |
| Crafting or Assembly | Right-Handed | Left Side | Provides a clear, shadow-free view of the small parts and tools you are manipulating. |
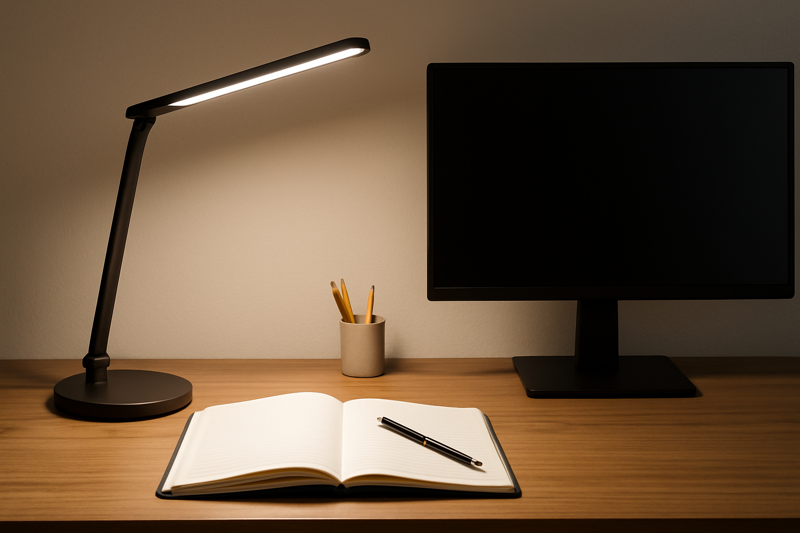
How Do You Light Your Desk Without Causing Screen Glare?
You need light to read papers on your desk, but turning on your lamp creates a huge, bright reflection on your computer monitor. You end up tilting your head back and forth to dodge the bright spot, leading to eye strain and neck pain.
To prevent screen glare, the lamp should be positioned to the side of your monitor, not behind it or in front of it. The light head should be adjusted so the beam of light shines down on your desk and keyboard, but its cone of light does not touch the monitor's screen at all.
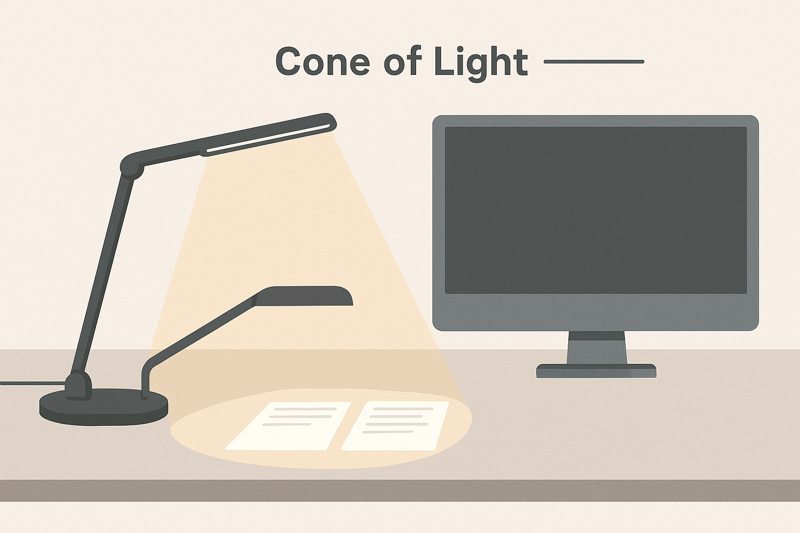
Glare is the number one enemy of office comfort. When we design our desk lamps at Royelamp, we are obsessed with giving the user control to eliminate glare. There are two types you need to defeat. The first is direct glare, which is when the bright light source of the lamp shines directly into your line of sight. The second, and more common problem for computer users, is reflected glare. This happens when the light from your lamp hits the smooth surface of your monitor and bounces directly into your eyes. Your screen acts like a dark mirror. Your eyes try to focus on the information on the screen, but they are also being assaulted by this bright reflection. This clash forces the muscles in your eyes to work much harder, which is a primary cause of Computer Vision Syndrome. A well-placed lamp can solve this problem completely. Finding that perfect spot where the desk is lit but the screen is not is the essential goal.
The "Off-to-the-Side" Technique
Never place a traditional desk lamp directly behind your monitor. The light will spill around the sides and create reflections. The ideal position is to the side, about an arm's length away. For most people who use a mouse with their right hand, the left side of the desk is the best real estate for a lamp. From this position, you can use the lamp's adjustability to aim the light precisely. You want to create a "task zone3" of light on your physical papers and keyboard that is separate from your "screen zone."
The Critical Role of Adjustability
This is why professional-grade lamps have long, multi-jointed arms and heads that can pivot and tilt in any direction. A fixed, static lamp gives you no options. A fully adjustable lamp4 gives you complete control to paint with light, placing it exactly where you need it and keeping it away from where you don't. You can lower the arm and angle the head down steeply to create a smaller, more intense pool of light for reading, or you can raise it to cast a softer, wider glow.
| Problem | Cause of the Glare | The Solution |
|---|---|---|
| A bright, mirror-like spot on your screen. | The lamp head is positioned where its reflection is visible to you. | Move the lamp further to the side of the monitor. |
| The top half of your screen seems "washed out." | The lamp is too high and its light is spilling onto the screen. | Lower the lamp's arm or head closer to the desk surface. |
| You can see the bright bulb in your peripheral vision. | The lamp head is aimed poorly, creating direct glare. | Angle the lamp head down so the light source is hidden from your eyes. |
| Your whole screen has a subtle, hazy glow. | High ambient room light is reflecting off an anti-glare screen. | Dim the lamp and rely on it for task lighting only; reduce overhead lights if possible. |
Is Your Lamp's Light Head at the Right Height and Angle?
You've put the lamp on the correct side, and it's not reflecting in your screen, but the light still feels uncomfortable. It's either a small, harsh spotlight or a weak, washed-out glow, and you can see the bright bulb from the corner of your eye.
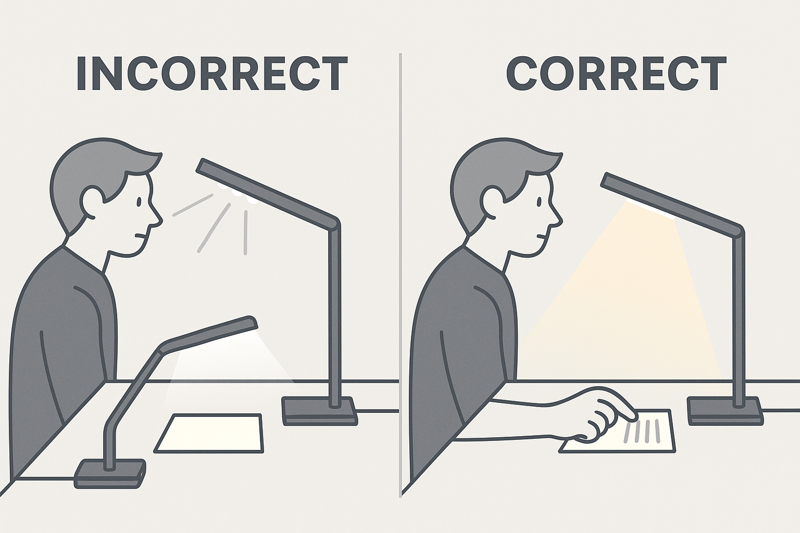
The ideal height for the lamp head is about 15 to 20 inches above the desk, and it must be angled so that the light source is directed down at your work and completely hidden from your direct line of sight.
When I'm demonstrating our lamps at trade shows, I often show buyers how to create the perfect "pool of light." The goal is not just to make the desk brighter; it's to create a zone of comfortable, high-contrast light right where you need it, without any distracting light spilling into your eyes or onto your screen. Getting the height and angle just right is the final step of perfect lamp placement. If the lamp head is too close to your desk, the light will be very intense on a small spot and the surrounding area will be dark. This high contrast between the bright spot and the dark surroundings can cause your pupils to constantly adjust, which is very fatiguing. If the lamp head is too high, the light becomes diffuse and weak by the time it reaches your desk. It loses its effectiveness as a "task light" and can start to create the glare problems we have already discussed. This is why the adjustability of the lamp arm is so important.
The "Above and Away5" Rule
A good starting height is about 15-20 inches (roughly 40-50 cm) from the surface of your desk. From this height, the light has enough space to spread out and cover a useful area of your documents and keyboard. The next step is to angle the head. The rule is simple: you should never be able to see the bare LEDs. The lamp's casing should always hide the light source from your eyes. Angle it down and away from you until the light is falling onto your work but the source itself is invisible. This completely eliminates direct glare, which is one of the most aggressive forms of eye strain.
Diffusers Create Softer Light
This is also why the quality of the lamp matters. Many of our Royelamp products feature a built-in diffuser6, which is a frosted or textured panel that covers the LEDs. This is a critical feature for eye comfort. Instead of having dozens of tiny, harsh points of light7, the diffuser blends them into one single, soft, uniform panel of light. This creates softer shadows and dramatically reduces the potential for sharp, mirror-like reflections on glossy pages or your keyboard. It turns a potentially harsh light source into a gentle and comfortable one.
| Height / Angle | Resulting Light Quality | Common Problem It Causes |
|---|---|---|
| Too Low (less than 12 inches) | A small, very intense "hotspot" of light. | Creates high contrast with the rest of the desk, forcing eyes to adapt constantly. |
| Too High (more than 24 inches) | Weak, diffuse, and washed-out light. | Fails to provide enough focused light for reading; can spill onto the monitor. |
| Angled Toward Your Eyes | The light source is visible. | Causes severe direct glare, squinting, and headaches. The worst possible position. |
| Angled Straight Down | A defined, even pool of light. | Good for flat documents. You can then fine-tune the angle for other objects. |
| Ideal Height and Angle | Covers the work area in even, soft light. No glare. | Optimal comfort and clarity for long periods of work and reading. |
Conclusion
Place your lamp on your non-dominant side, position it beside your monitor, and angle the light down onto your work.
-
Understanding task lighting can enhance your workspace efficiency and comfort, making it essential for any detailed work. ↩
-
Exploring ergonomics can help you create a more comfortable and productive workspace, reducing fatigue and improving focus. ↩
-
Understanding the concept of a task zone can enhance your workspace lighting, improving focus and reducing glare. ↩
-
Exploring the advantages of fully adjustable lamps can help you choose the right lighting for your needs, enhancing comfort and productivity. ↩
-
Understanding this rule can help you optimize your workspace lighting for better comfort and productivity. ↩
-
Learn how diffusers enhance light quality, reducing glare and eye strain for a more comfortable work environment. ↩
-
Discover the impact of harsh lighting on your eyes and how to create a more pleasant workspace. ↩
